As promised in “Got Glue?” I finished the black cherry bowl that sported a compromising crack across the base of the piece. The wood moved a LOT while stabilizing for a week, requiring removing about 2-3mm at the rim to get it back in round. Even then, the wood continued to move as I hollowed out the piece. What didn’t move (thankfully), was the crack.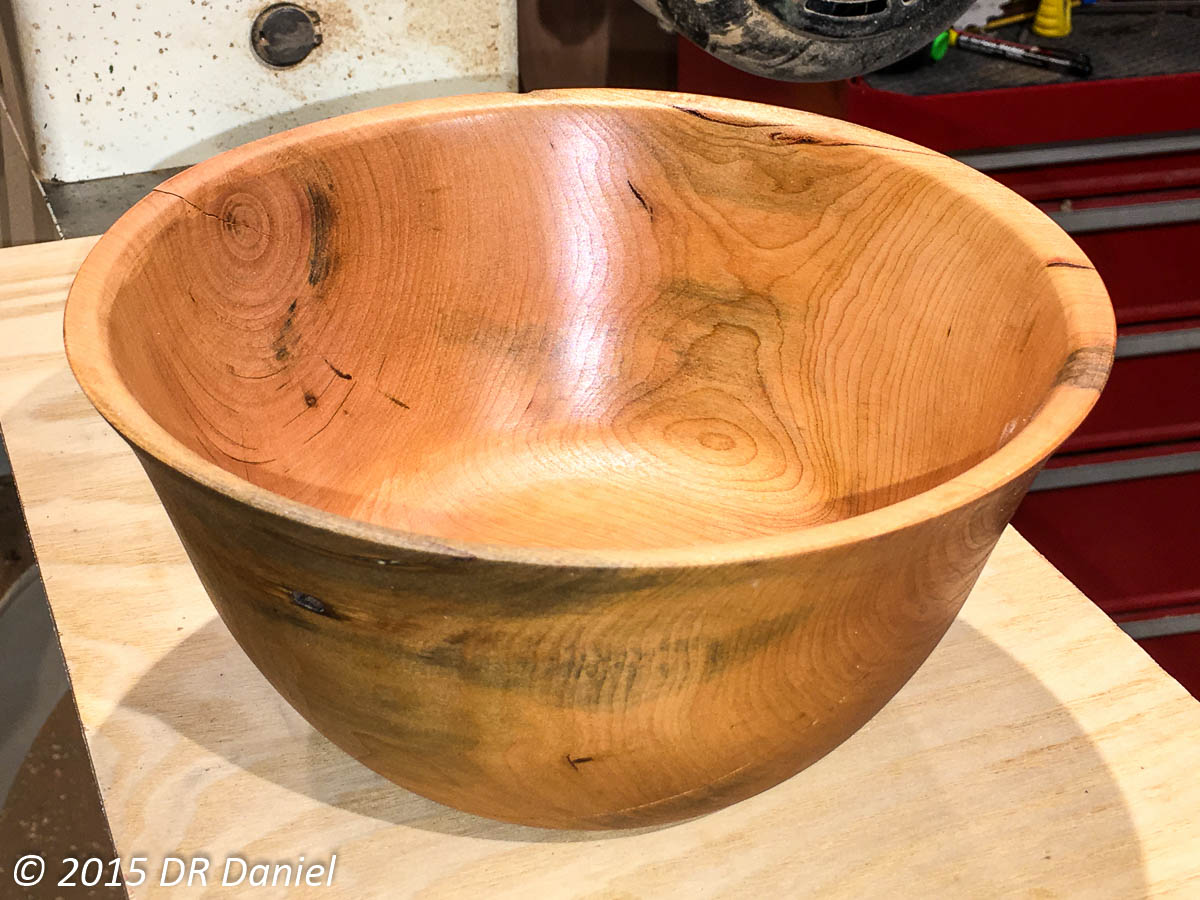
Pile O’ Black Cherry
I’ve been watching one of our black cherry trees the past year. It was tall, dead, standing, and a large diameter. It would likely have a lot of good wood for bowls, vessels and vases. It was definitely dead, but still standing, which meant that it had minimal rot running through the tree. I planned on harvesting the material next summer, but rotted roots couldn’t keep it standing in the recent warm weather. 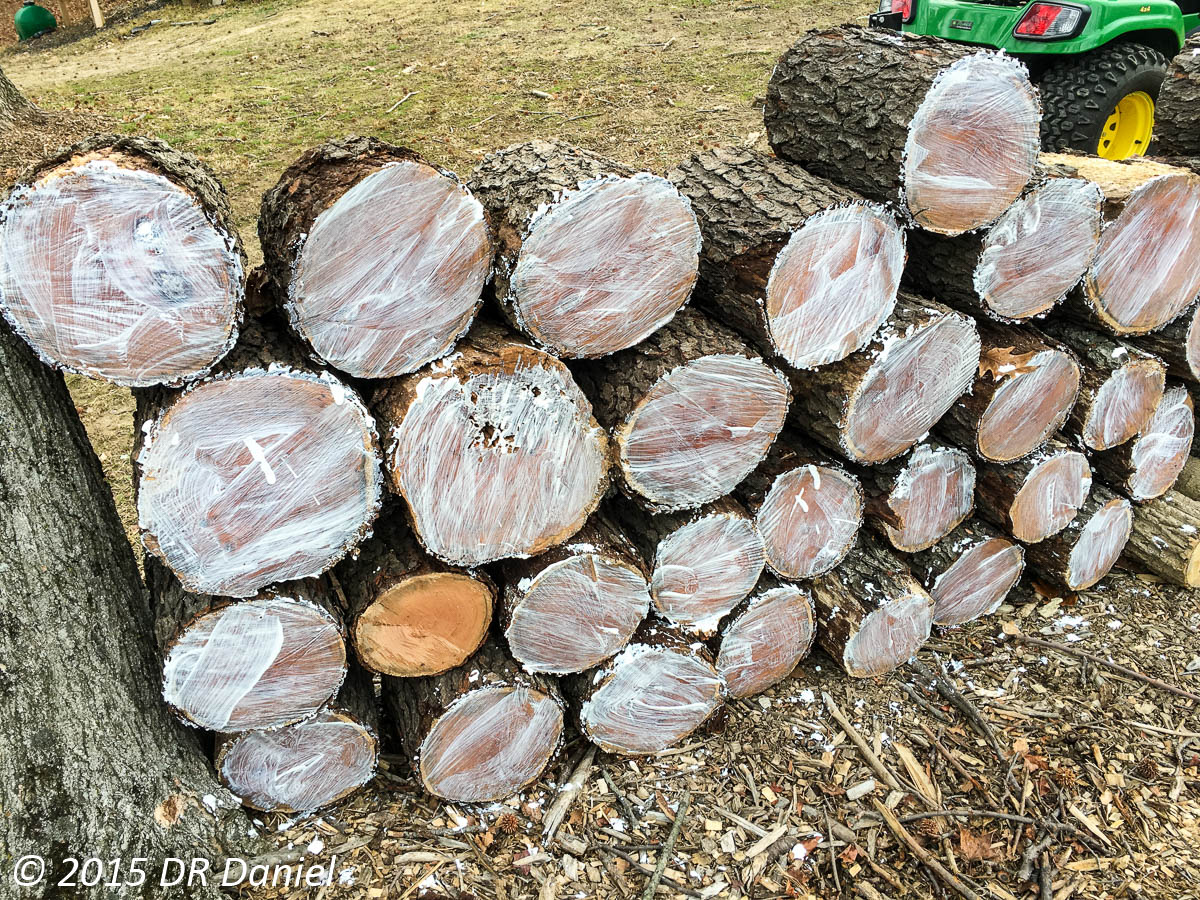
A quick session with the chain saw yielded Continue reading Pile O’ Black Cherry
Got Glue?
I dropped a large dead cherry tree in the woods today and just had to test-turn a piece. I had stacked and treated most of the logs to give them time to stabilize. I ripped one of the logs into a pair or turning blanks and mounted one on the lathe. This wood turns like a dream. It cuts very easy, yet has enough strength to minimize tear-out. Even in this freshly cut state, the color is very pronounced. (Cherry takes a few years in sunlight to get that rich, deep cherry color).
I rough-turned the piece and quickly established Continue reading Got Glue?
Product Review – RAM Power 45 Carver

Check out my review of the RAM Power 45 Handset and Controller.
Carving Some Maple Leaves
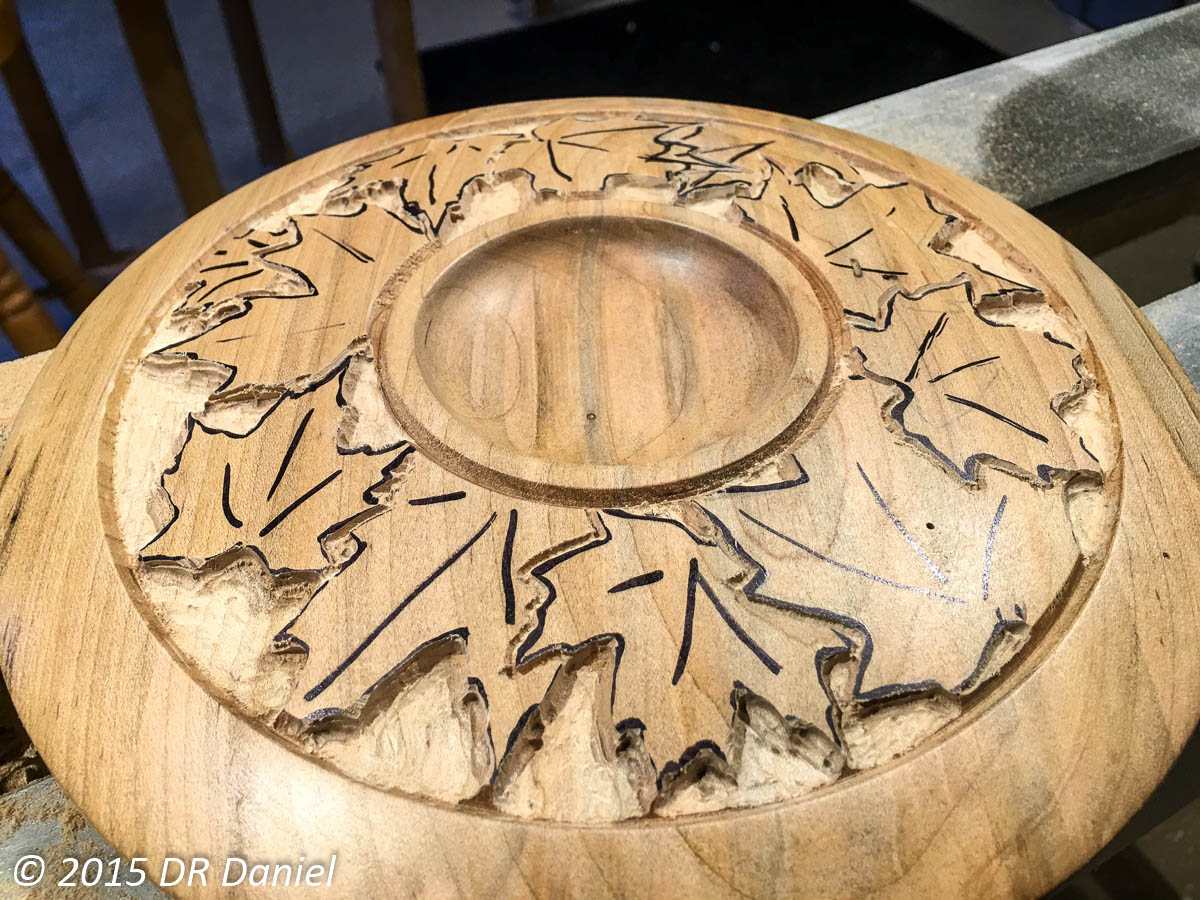
Part two of the Maple Leaf Bowl is now available. Check out The Carving – Defining the Shape. This installment shows the two dimensional shape of each leaf being defined while waste wood is removed to the desired relief depth.
Maple Leaf Carved Bowl

I’m starting out on a new art piece that will merge my bowl turning and carving. I have taken some in-process pictures and recorded my thoughts behind creating this new piece. You can read more starting with part one of the new tutorial: Maple Leaf Carved Bowl – The Idea
A Small Cherry Bowl
Always on the lookout for interesting wood to turn, I found a small standing dead cherry tree in the woods and finally got around to taking it down. As it hit the ground, most of it shattered in a pile of rotted wood. However, I was able to find 6-8 candidate pieces towards the root end of the tree.
Cutting them into a variety of sizes for bowls , vessels, and urns, I was suddenly anxious to mount one of them on the lathe and see what I might get out of it. But first, I treated the cut ends of each piece with wax to minimize checking. Even though the wood was long dead and I didn’t have to worry about green wood shrinkage, I knew there as a lot of rain moisture in the wood that could still cause a lot of splitting as it dried out. I rip-cut 2 pieces in half, leaving the rest remaining as full-log pieces for crafting some new ideas.
Here’s my challenge blank; a small half-log with a lot of punky, soft spots that I knew would haunt me later on. 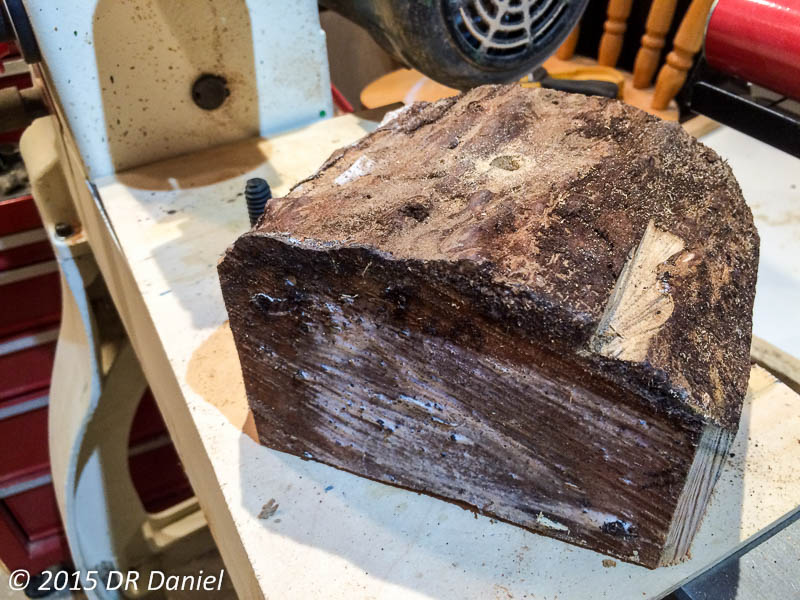 Rip cutting the piece gave me a clue to how the wood would look, as it already was a salmon pink color, with a small amount of edge spalting and coloring.
I decided the base would be at the pith side of the log. I drilled a hole in the bark side of the piece to accept a screw center, mounted that into a scroll chuck, and brought up the tail stock for security. As it turned out, the bark side of the log was so soft, it was a challenge to get a secure mount on the chuck. For future pieces, I’ll use my 3″ forstner bit to get down to solid wood, where the screw has a secure hold and the chuck jaws are landed solidly.
Another option would be to mount it between centers, using a steb-center drive end for safety. However, this piece was just too soft to safely mount between centers. I prefer the solid mounting of the screw center, knowing that the log is held in place with the screw threads as well as the effect of having a pin (the screw) holding the piece laterally.
You can see just how soft this wood is by looking at how far in the tailstock has disappeared into the blank. That edge will eventually have a tenon to hold the blank in a scroll chuck, so I wasn’t too worried about a hole revealing itself in the finished piece. Fortunately, with the exception of the pith area and the bark edge, the wood was acceptable for turning.
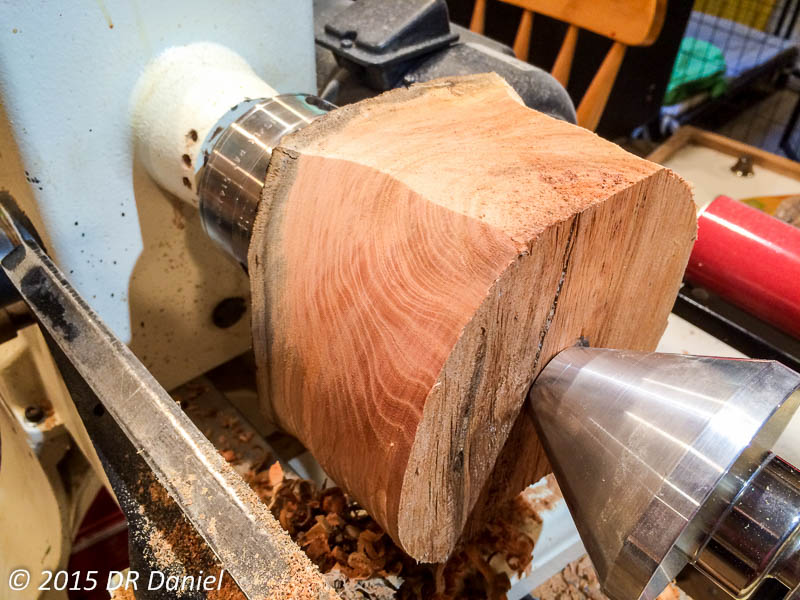
Even so, I had a huge amount of tear out – something that simply can’t be avoided with wood that is halfway between fresh and rotten mulch. Each growth ring has very soft spring wood that leaves hundreds of opportunities for tear out. It’s hard to see the tear out in the picture above, but it’s there.
Once the piece was shaped, and found I had to spend a huge amount of time shear-scraping the piece. This was about the only way I could possibly hope to get a smooth, polished piece. As it turned out, the results turned out far better than expected. Her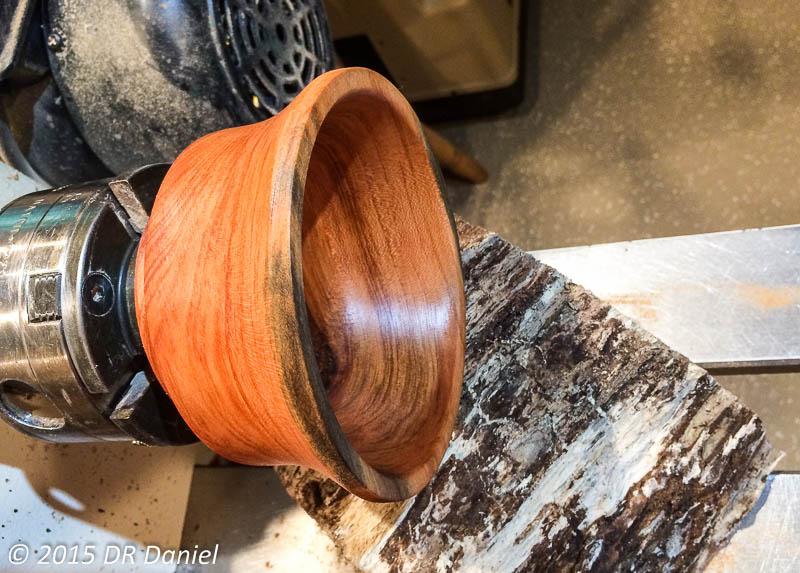 e, you can see the remarkable salmon color, and the green accent coloring near what was the outer edge of the log.
I still need to finish polishing the piece and applying a few coats of oil and wax before reversing the bowl and removing the tenon. That, and signature and date, and we’ll call it finished. Of course, the piece is for sale (as is almost all my work). Look for it on my Etsy site soon.
Quit reading and go make some shavings!
Walnut Box
I can never underestimate the therapeutic value of time on the lathe. Besides (usually) ending up with a nice finished piece to show for my work, the focus required in turning does a remarkable job of blocking out the noise in life.
Feeling a bit stressed lately, I recently took advantage of a rainy day to turn a small lidded box. I enjoy turning lidded boxes – they require a variety of turning skills and multiple steps to complete. You have to be very purposeful of your cuts, as the wrong order will present a dead-end on being able to hold the piece.
I know, I know, you want a detailed how-to and some in-process shots, but I got so focused on creating this small piece that pictures were the last thing on my mind. I’ll create a full tutorial soon, complete with instructions and pictures.

The box is polished walnut, around 5 inches tall. It is finished in one coat of tung oil. I’m always amazed at how nice this wood finishes out. This walnut was from my collection of found logs from a burn pile at a local road widening project. While not free once you consider the cost of wax, chainsaw, bandsaw and time, it’s very gratifying to take a piece of wood destined to be burned and turn it into a finished piece of art.
Mid-Winter Hunt for Wood
I’ve got a turning demo coming up and needed material for a natural edge bowl, which means I needed a log, which you can’t buy at the lumber yard. Luckily, I’ve got an endless supply of wood that is readily available right in my back yard in the form of downed trees and limbs from winter storms. The nice thing about fallen wood is that its usually been dead for awhile, so there’s no waiting for it to season.
So I ventured out on this winter evening, braving wind chills in the single digits, chainsaw in hand, to find a suitable chunk of log. I returned with a half-dozen logs, ready to split-cut on the bandsaw and prep for turning. I felt good about my find….
…until I remembered that I haven’t yet wired the 220V circuit for my 21″ bandsaw, and my little 14″ doesn’t have the vertical capacity for anything larger than a loaf of bread. I’m still building out my shop after our move, and don’t have a 220 circuit to wire up. Soon, but not in time for the demo.
I ended up going back out for a set of smaller logs for the demo that my smaller bandsaw could handle. For the larger logs, I dug out my portable carving clamp/sawhorse and was able to secure them for cutting with the chainsaw. It was a safe process, but I really prefer the stability and accuracy of the bandsaw.
I’m going to put together a tutorial on log preparation, including how to mount them for turning. But first, I think I’ll get the electrician in to run my new 220 primary feed to the new shop panel.
Rolling out a New Site!
It’s been a long time coming. The new SplinterShop website is being designed with an all new look and room for new content. Hopefully, by the time you found your way here, the site left its ugly behind. Look for changes and enhancements in the weeks to come. Ugly or not, I’m back online with www.splintershop.com!
My hosting provider graced me with a better hosting plan (I host 12 domains with them), bandwidth, disk capacity, and database capabilities for a lot less than what I had been paying. Up until now, I’ve been hosting my domains on local servers and simply using my hosting provider as a DNS conduit to my sites. With the new hosting plan, I can take advantage of moving my sites to new, managed servers at my hosting provider. But heck, the old site design was, well, old. It was bleeding-edge technology at the time, but now it’s simply old technology ready for a new platform.
The Splintershop site was temporarily taken down in 2014 after a continuous run since the domain was registered way back in 2001. I took the site down for security reasons, as the blog technology was no longer supported and became vulnerable to hacks. Meanwhile, I continued to do turning demos, do 1:1 classes, and post on the SplinterShop Facebook page. People have been asking about when the main website will be returning, and here’s your answer!
The new site is being designed to run on top of a highly modified version of WordPress, a product I have run for many years on a few of my other sites. It’s going to take awhile to get it setup the way I want, so be ready for a lot of different looks as I implement new features. First, you’ll get some good content displayed on an ugly website. That’s right, function over form for awhile. Eventually it will look amazing. I know it will be all worthwhile.
I hope you’ll like where this is going.