Something I’ve learned from giving wood turning demos, teaching a class and attending art shows is that people are pretty quick to pick up and understand the mechanics of making a bowl. Granted, they will still need a lot of practice in their own shop to complete an adequate piece, but they usually “get” how it’s done from watching me in action.
What’s missing for them is the thought process behind my work. Explain as I might during a demo, turners get fixated in the how it’s done and usually fail to hear the why. I think there’s a “teach a man to fish” moment in there somewhere. Seems like there is more interest in what speed I’m turning rather than why I chose that speed, for example. When asked the question, I reply with a “what speed would your turn this?” and startup a dialog on what’s behind the speed I selected (which often was just a random choice).
So here’s a short narrative on what goes on in my head as I’m starting a new creation. You won’t find much in the way of tool techniques here. I’ll take you into the thought process behind my work. And yes, I am usually getting out of my head and just putting steel to wood to see what happens; there are those spontaneous times of creation. But I’ll use a real life example of one of those rare, intentional, thought-process projects I recently tackled.
I’ve been wanting to create a carving-embellished art piece for a long time. Rather than a fully-carved piece, or a sculpted art piece, I wanted the carving to complement a bowl or vessel rather than do a solo on the carving. I wanted a yin/yang.
I have spent an enormous amount of time thinking this one through, moving back and forth on how I might approach the work. I’ve practiced carving and wood burning techniques on scrap wood, with very reasonable results. I’ve even researched and purchased additional tools (anyone that knows me knows that a new tool is a prerequisite for any worthy project).
Carving is a lot like drawing. You (usually) can’t use a straight edge or guide. It’s free form. Do it on a three-dimensional piece like a bowl, with its non-planar surfaces, and it becomes even more challenging. Carving within the shape of a bowl or vessel adds additional constraints to carving. It must complement the bowl.
Carving also takes many forms, such as very formal and disciplined chip carving, to a full-blown free-form dragon breathing fire. I wanted something more in line with leaves, nuts, or flowers in a slightly three-dimensional shape. Think of leaves lying on the ground.
The other issue I had with many carved pieces is there wasn’t a smooth transition from carved space to the rest of the piece. I’m an engineer. Engineers like constraints. I think boolean – it’s either carved, or it’s not. I’ve seen a number of beautiful carvings inset into an otherwise smooth surface where the artist created a random depression for the carving. I wanted something a little more formal than an undefined boundary. I wanted to show off my highly polished wood surfaces and offset that with the textures of carved shapes, but keep clear boundaries between the two areas. I wanted my boolean.
So there’s my requirements shopping list. Thinking through this, I came up with a specific plan: I would turn one of my highly polished bowls and create a well-defined area for the carving field. The margins between the carving and the bowl surface would be a bordered by some type of margin. Candidates include a deeply turned V or cove, or perhaps a ridged transition ring. I could even use a metal inlay to define the boundary. It’s pretty clear I’ve spent way too much time debating what to do. I settled on the V-groove for the transition. This would give me the best of both worlds (I hope).
 The unknown for me was what shape to make it. I wanted a shape that would be pleasing on its own merits, yet would provide sufficient real estate for the carving. Well, I looked over a number of my past bowls, vessels, platters and sculpted pieces for inspiration. I was immediately drawn to what I refer to as my Jetson’s bowl, pictured here. It had a pleasing shape, was quick to turn, had substantial thickness for carving, and had ample space to carve. [Don’t make me explain why it’s called a Jetson’s bowl]
To be clear, I’ll be doing similar carving on thin-walled bowls and hollowed vessels, but the Jetson’s bowl eliminated the worry of blowing through the wall thickness to the interior of the bowl or vessel. I had large reserves to carve into rather than limiting myself to 1/4″ or less. Heck, there’s enough material there that I could turn away the first attempt and start fresh.
Alright, then. The shape is duly inspired. What material would I use? I have a large selection of wood from exotics, burls, domestic wood, spalted, figured, you name it. I immediately decided against using a highly figured wood, as I wanted it to be a carving showpiece supported by a pleasing shape. I didn’t want the wood overshadowing the carving. Even the flame maple of the Jetson’s bowl was considered excessive and ruled out. However, I did want character beyond blond straight-grained box elder, for example. I also needed material that would be suitable to carve. No oak or ash here. Nothing punky or soft. Burls were also out of the running.
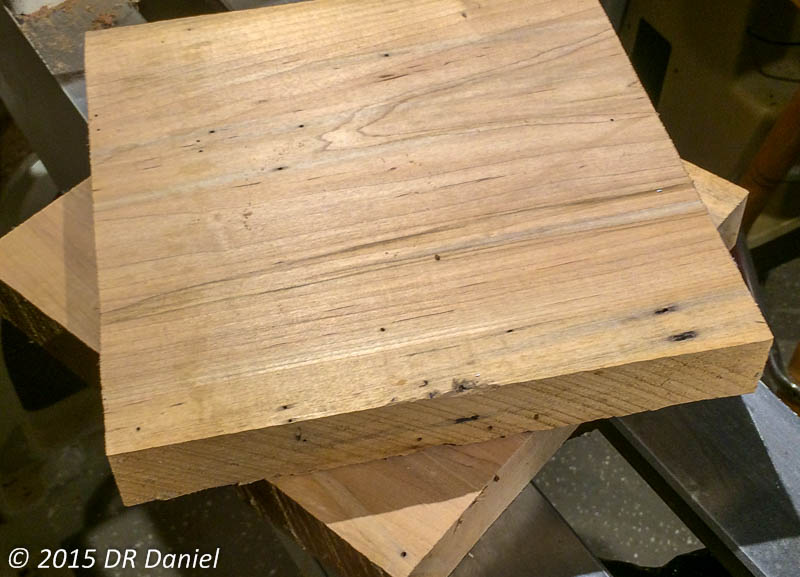 I finally settled on some of my lightly-spalted hard maple. I’ve done a lot of pyro work on this wood, and enjoyed how well it supported fine detail work. The wood color balances well with carving without being overpowering. It readily takes dyes and coloring, if that’s your game. Likewise, the grain has enough figure to be interesting without going overboard. As already mentioned, the grain and wood hardness can certainly support carving details. I have an ample supply of this wood, collected about 20 years ago when I lived in Michigan. Most of it is in slab form – too thin for anything other than platters. Or wait, maybe it’s perfect for a shallow version of the Jetson’s bowl!!!
30 minutes after th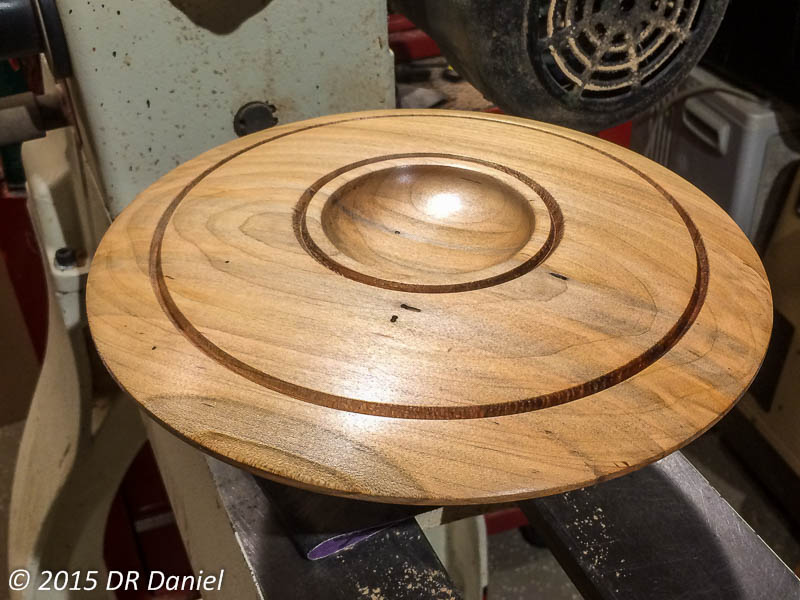 e epiphany, I had a blank prepared, mounted, turned, and polished, ready for some carving love. Time to clean up the shavings and bring out the carving gear.
Wait, wait, wait…before I can carve, I need to know what I’m carving. As already mentioned, I want to do an assortment of leaves. It only makes sense to carve maple leaves into a maple bowl. The turned bowl is only 10-11″, and the carving field is much smaller, so I’ll have to scale any leaves down to make a nice array. Fortunately, I have a oodles of maple trees on my property, and fortunately, it’s summertime when leaves are out. Make a note to self….be sure to scan in a variety of leaves for those times when leaves aren’t to be found.
 I’m also concerned about the arrangement of the leaves. I found a grouping of leaves to look at how they overlap and the overall arrangement. Since they were still on the tree, they were oriented in roughly the same direction, but I wanted a little more randomness. Actually, a lot more randomness. I gathered a set of leaves and simply dropped them on the ground as a start for my layout.
I want a good quantity of leaves to give the piece a lot of detail. Of course, more leaves, means more detail, which means more time to complete the work. I had already decided that I would need to carve the entire field, and who wants to carve a large background recess? So….lot’s of leaves, please.
And while I’ve set a clear boundary on where to carve, I’m not going to limit myself to whole leaves only. I’ll purposely let leaves be  trimmed to fit into the space. I opted to play paper dolls to decide the layout, taking my assortment of leaves and arranging them until I was happy. Another option would use a computer to assist the layout. Heck, this is the type of stuff computers are meant for. I could scale, rotate, flip, do all kinds of manipulations to the leaves to try out different approaches. But remember, I get impatient, so I punted to laying out the leaves as you see in the picture. In itself, this process was therapeutic as I would get immediate feedback on my ideas.
I found myself struggling with one aspect of my decision – to allow the edge of leaves that fell outside of the boundary ring to be trimmed off. In my layout process, I’m seeing full leaves, while the final result would be trimmed leaves. I debated about trimming the leaves in the final layout, just to confirm it would look ok, but that would be too disruptive of the layout. I decided to commit and move on.
Before I started tracing the leaves, I made a few adjustments on where they overlapped, their orientation, added in some more randomness, and mad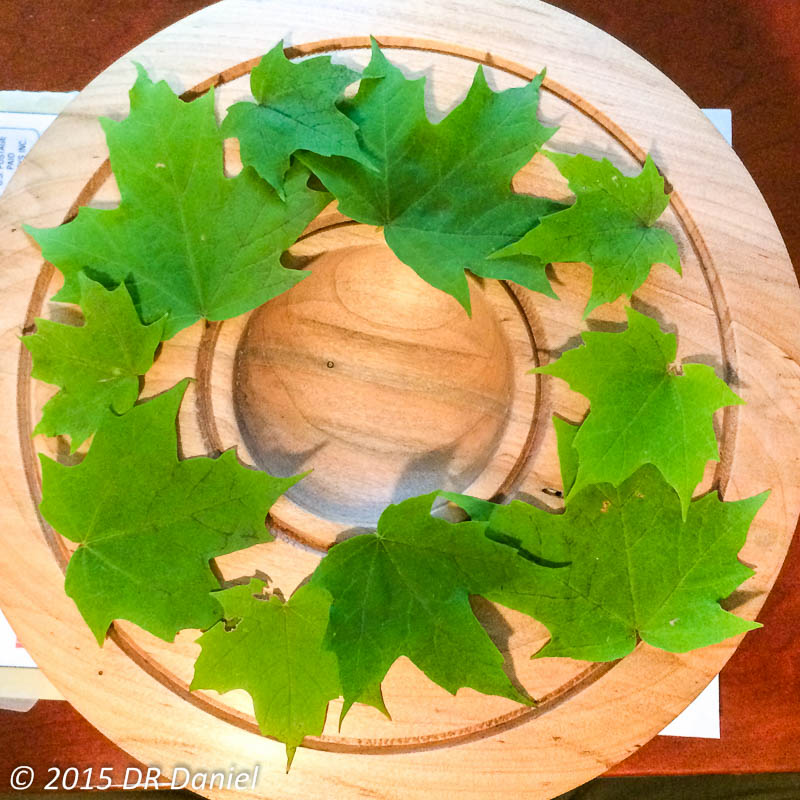 e sure I was close to what I wanted. I snapped a number of pictures of the arrangement to reference during the tracing step, and later during carving. In a complex pattern such as this, it’s far too easy to lose sight of which line is for what leaf, etc. The picture will be printed out and placed in the work area to help guide me.
Time to start tracing!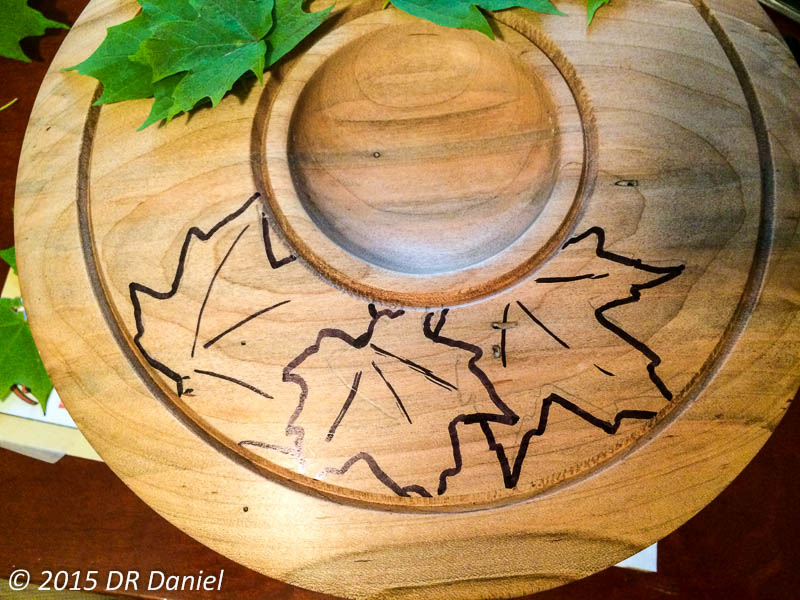 In my usual “throw it to the wind” method, I decided to use a sharpie to mark my pattern. A pencil would allow for changes, but would make it very tough to see. I opted to go for it and use the sharpie, paying careful attention to the overall pattern and leaf overlap. I added in the leaf veins to help add context to the outlines. It helped tremendously to see how the veins would end up moving your eye around the piece.
 I completed the tracing and double-checked my work. It looked reasonable, and random. Yeah, intentional randomness. I did a little coloring in of the background areas to give me a better feel for how it might look. If I didn’t like the layout at this point, I could easily mount the bowl on the lathe and sand it all off and start over. Overall, I’m pleased with where this is going.
It’s at this point that I could really appreciate the amount of work I was facing. Having made some leaves on a test piece, I had a good idea of how long this piece might take. I had to quickly quench the urge to change directions to a simple, polished bowl. I’ll have many future opportunities to resist shortcut temptations throughout the project.
So there’s the genesis of this bowl. Look for the next part of this series Maple Leaf Carved Bowl – The Carving, Outlining the Shape, found here.
